Many people assume that cooking Indian food is complicated, and mastering it requires years of expertise passed down from great, all-knowing Indian grandmothers. I understand why it must feel like that sometimes - you open an Indian cookery book with the enthusiasm of a puppy, but are immediately confronted with a lengthy list of spices and ingredients, most of which you barely recognise.
Now don’t get me wrong…it’s not as if you can do without the spices and fresh ingredients. But in truth, there are a whole host of tips and tricks that make Indian cooking at home accessible, enjoyable, easy, and most gratifyingly, delicious.

Illustrations by Rory Midhani
The Secrets of Indian Cooking: Indian Pantry 101
That’s what I do. I demystify and simplify Indian cuisine in my cookery classes to make my students want to spend time cooking it in their kitchen.
The first step is getting your pantry stocked properly. No matter how diverse regional Indian cookery is, there are some basic commonalities and key ingredients that are used across the whole sub-continent. Here are what I think are the essentials for the Indian pantry, that will allow you to create enjoyable Indian food any time you get the craving for curry.
Foundations
Garlic / Onions / Ginger
Undeniably ubiquitous, this ‘holy trinity’ is frequently used to form the base for dishes almost everywhere in India – especially when it comes to cooking poultry and red meat. If you don’t cook with ginger and garlic that often, you can easily freeze them and use when needed. Follow these steps for storage:
- Grind ginger and garlic down into separate pastes using a food processor (you can also grate instead).
- Place each paste in a sandwich bag, pat flat until very thin and then seal.
- Place the bags in the freezer - whenever you need some, just break a shard off and you’re good to go.
Chillies
Some like it hot, others don’t. Whichever camp you sit in, the not-so-humble chilli adds a great deal of depth, if not heat, to your dishes. Chillies come in different varieties, but I tend to go for finger or bird’s eye. If you’re not a fan of too much heat, don’t de-seed. It’s not done in Indian kitchens - just use less of the chilli. Also, if you want to make your chillies last longer, follow these steps:
- Wash and then dry your chillies well.
- Remove the stems (this is the most important step).
- Store in a container with a lid and keep in the fridge - they can last up to an extra couple of weeks.

Photo @anya-bell-du-unsplash
Tomatoes
Traditionally, fresh tomatoes are used in Indian cooking, which are slowly cooked down until they are soft and paste-like. This can take some time so I frequently use tomato passata - the tomatoes are pre strained and smooth, so all the hard work is done for you.
Coriander
The main herb used in Indian cookery is coriander (aka cilantro). Fresh is obviously best but it also freezes incredibly well. Follow these steps for the best way to store in the freezer:
- Wash your coriander and then dry (I like to use a salad spinner and then pat dry with a tea towel.
- Chop (both leaves and stems).
- Place in a freezer-safe bag or container - whenever you need some, grab a handful and sprinkle it into your favourite curry from frozen.
Spices
Yes, there are hundreds of spices but there is no need to feel overwhelmed. Two things are important when buying spices. Firstly, only buy as much as you need. If you don’t cook Indian food often, do not opt for a larger pack - even if it’s more cost effective. Yes, spices don’t really ‘go off’ but they will begin to lose their flavour and strength after about 6 months. Secondly, if you’re new to cooking with spices, only purchase the essential spices first, before you branch out. I’ve listed what I consider to be the essentials, which will help you get started on your Indian cooking journey.
Cumin seeds – nuttiness and can be made into cumin powder
Turmeric – earthiness and colour
Chilli powder – heat
Coriander seeds – citrus notes and can be made into coriander powder
Garam Masala – warmth
Asafoetida – onion/garlic flavour
Salt – flavour enhancer (and possibly the most important addition to your cooking)

Photo ©prachi-palwe-unsplash
Lentils and beans
Lentils and beans are part of the daily diet for so many Indians, especially those who are vegetarian. There is a huge variety and they can be purchased in different forms - whole, split, with the husk and huskless. I have listed the five varieties I think should be in your pantry at all times:
Masoor lentil - aka red lentil (split and orange in colour) - my ‘go-to’ lentil. They have a mild, earthy flavour, do not require soaking and cook very quickly.
Moong beans - (whole & green in colour) - high in protein, tasty as a dal and can also be sprouted, which can then be added to salads etc.
Moong lentil - (split & yellow in colour) - mild, sweet flavour, perfect for dal soups, can also be made into a paste & deep-fried to make spiced fritters.
Channa lentil - (split & light yellow) - nutty in flavour, a hearty and filling lentil.
Kabuli Chickpea - aka garbanzo beans (beige in colour) - nutty and creamy, very popular all over the country, especially in North India where the dish Channa Masala originates, also used as a topping on street food snacks.
Rice, Breads and Flours
Most Indian dishes are served with either rice and/or breads. In many Indian homes, they are cooked fresh daily. I’ve noted what I always like to keep in the house:
Basmati Rice
It’s a good idea to keep both white and brown basmati rice depending on what you’re cooking and how much time you have.
Chapati Flour (aka atta flour)
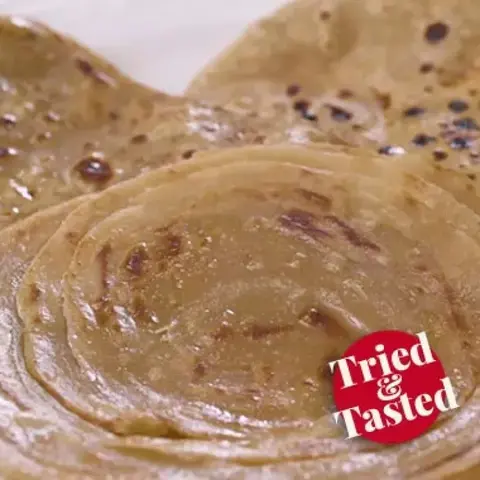
You can make lots of different breads from atta, not just chapatis. It comes in many varieties (white/brown/medium) but my personal favourite is ‘chakki atta’ which is a stone-ground chapati flour. It helps create a smooth, pliable dough and is also higher in fibre compared to other attas. Chapati flour is used to make rotis, a variety of different parathas and puris.
Gram Flour (chickpea flour)
Though it is not strictly used to make breads, gram flour is great to have in your pantry to make anything from savoury pancakes to spiced dumplings and fritters. It is made from ground chickpeas so is gluten-free and tastes incredibly nutty. It can also be used as a thickening agent.

Photo ©monika-grabkowska-unsplash
Equipment
A bad workman always blames his tools, but when it comes to Indian cookery the right ones can go a long way to help you cook mouthwatering dishes confidently and consistently.
Pressure cooker
A pressure cooker is an essential piece of equipment in Indian kitchens - from cooking lentils and rice dishes within 10 minutes, to preparing melt-in-mouth lamb curries in less than 30 minutes. Some people are frightened of using them, but there is no need – they’re now built very safely. I use my pressure cooker nearly every day.
Food processor/Micro grater
You will often see Indian recipes that require ingredients to be finely chopped/grated. For this, a food processor can be really helpful and speedy. A micro grater is also effective for grating and making smooth ginger and garlic pastes.
Tava pan and rolling pin
A tava is a flat pan we cook breads on – chapatis and parathas being the most popular. If you can’t source one you can use a crepe pan instead. To roll out your breads, you’ll also need a rolling pin. Indian rolling pins tend to be a little smaller than classic western ones and are sometimes tapered – this allows greater control when it comes to rolling out your chapatis thinly and evenly.
Good quality heavy-base pan with a lid
It sounds obvious, but it is important to have a good-quality pan with a lid. For example, when it comes to caramelising onions (necessary for most meat curries), a heavy pan will allow you to retain the heat, which is essential.
Spice/coffee grinder
This may not be considered an essential per se, but being able to grind down your own spices (for example from coriander seed to coriander powder) can hugely enhance the end result of the dish you’re cooking. The flavour and potency you get from grinding your own spices are incomparably better than shop-bought powders.
Your pantry has now been injected with a boost of spice and colour, so you’re officially ready to start your culinary journey around India. Happy travels.


